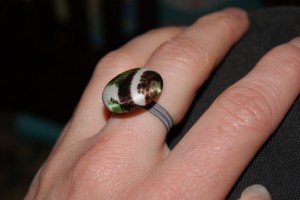
Maybe it's because Christmas is around the corner, but I am starting to look for fun little things for my kids. Sometimes we craft together, and sometimes I make things as gifts for them. I love an easy, homemade stocking stuffer for my girls. And my little ladies do love their jewels, but as they are wont to lose precious items, a cheap, but tender gift fits the bill!
What You Need
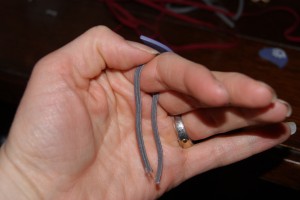
- quarter-inch short piece of elastic (3 inches)
- a button with holes large enough to accommodate elastic
- scissors

Step 1: Thread the button
Often, button holes are pretty small. If you're struggling with threading the elastic, cut it at an angle and pull it through. If the edges are rough, don't worry. You'll be cutting them later anyway. With a two-hole button, be sure to thread from underneath.
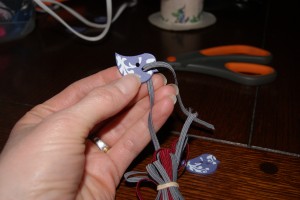
Once you've done one hole, thread back through the other side.
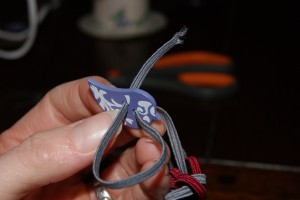
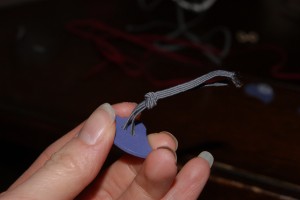
Step 2: Pull the elastic and tie it.
Pull the elastic so that it's taut. Leave enough room for your finger to fit in it and tie a knot.

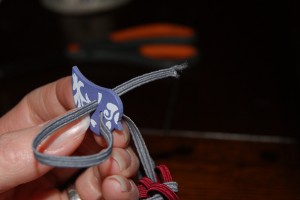
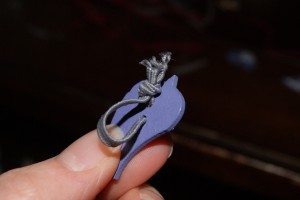
Step 3: Tighten the knot.
Pull at the knot from both sides to ensure it is secure.
Trim the excess ends. I did this twice to make sure the knot was tight enough not to come undone once worn. Thus, I trimmed twice as well to have a neat knot.
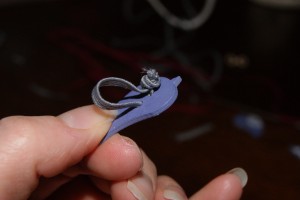
You will also want to pull the knot around to rest under the button, so that it's not visible.


p.s. You can also use left-over fabric-covered buttons!